Tiling behind the stove isn’t just about aesthetics; it’s about protecting your kitchen walls from heat, grease, and moisture. Whether you’re working with a slide-in range, a freestanding stove, or a cooktop with a hood, knowing how far down to tile behind the stove ensures both safety and style.
The backsplash acts as a barrier, shielding your wall from splatter and steam. But its placement affects more than just cleanup; it influences how your kitchen feels visually. A well-positioned backsplash can elongate the space, highlight cabinetry, and even complement your flooring choices, especially if you’re exploring durable kitchen floor tile ideas for a cohesive look.
Standard Tiling Guidelines Behind the Stove
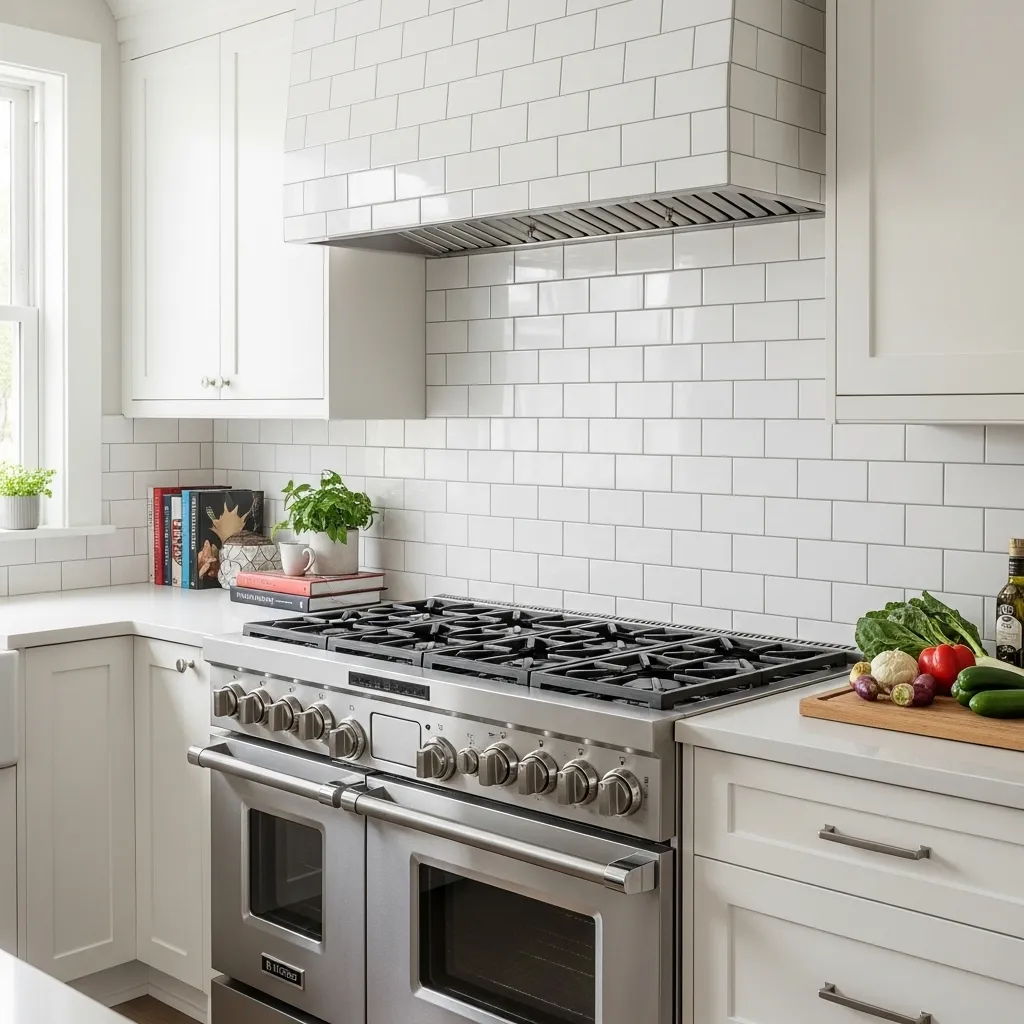
While there’s no universal rule, most professionals recommend tiling from the countertop level up to 18–24 inches behind the stove. This height typically reaches the bottom of upper cabinets or the underside of a microwave hood. For open wall setups without overhead cabinetry, tiling can extend 30–36 inches or even all the way to the ceiling for a dramatic effect.

If your stove has a built-in backguard, you can start tiling just above it. For slide-in ranges without a back panel, begin at the countertop and tile upward. The goal is to create a seamless, easy-to-clean surface that protects the wall and enhances the kitchen’s visual flow.
Designer’s Note: Always use heat-resistant tile materials like ceramic, porcelain, or sealed natural stone. These options withstand high temperatures and are easy to maintain.
Installation Tips for a Flawless Finish
Getting the backsplash height right is only part of the equation. Here’s how to ensure your tile installation behind the stove is both functional and beautiful.

1. Start at the Countertop
Begin tiling at the countertop level to create a clean visual line. This anchors the backsplash and ensures it aligns with adjacent surfaces. Use a level to mark your starting point and avoid uneven rows.
2. Tile to the Cabinet or Hood Base
If you have upper cabinets or a microwave hood, tile up to their base. This creates a natural stopping point and avoids awkward gaps. For open walls, consider tiling higher to add drama and vertical interest.
3. Use Heat-Resistant Adhesive
Behind the stove, temperatures can rise quickly. Use a high-quality, heat-resistant adhesive and grout to prevent cracking or discoloration over time. This is especially important for gas ranges or high-BTU cooktops.
4. Match Tile Style to Flooring
Your backsplash should complement your kitchen flooring. If you’re exploring durable kitchen floor tile ideas, consider echoing textures or tones in your backsplash. For example, matte porcelain on the floor pairs beautifully with glossy ceramic behind the stove.
How Stove Type Influences Tile Coverage
The type of stove you install plays a major role in determining how far down to tile behind it. Freestanding stoves often expose more wall surface, making full-height or floor-to-ceiling tiling a practical choice for protection and visual continuity. Slide-in ranges, on the other hand, typically sit flush with countertops and may include a built-in backguard, allowing you to start tiling just above that panel.
For cooktops installed into tall kitchen islands, tiling may be limited to the vertical backsplash zone behind the burners. Always consider the stove’s profile, heat output, and wall exposure when planning your tile layout.
Design Options That Elevate the Space
Tiling behind the stove isn’t just about coverage; it’s a chance to make a statement. Here are a few design directions to consider:
Full-Height Tiling
For a bold, modern statement, tile from the countertop all the way to the ceiling behind the stove. This approach works beautifully in kitchens without upper cabinets, creating a gallery-like vertical canvas. It draws the eye upward, adds drama, and pairs well with minimalist or industrial design themes.
Framed Tile Panels
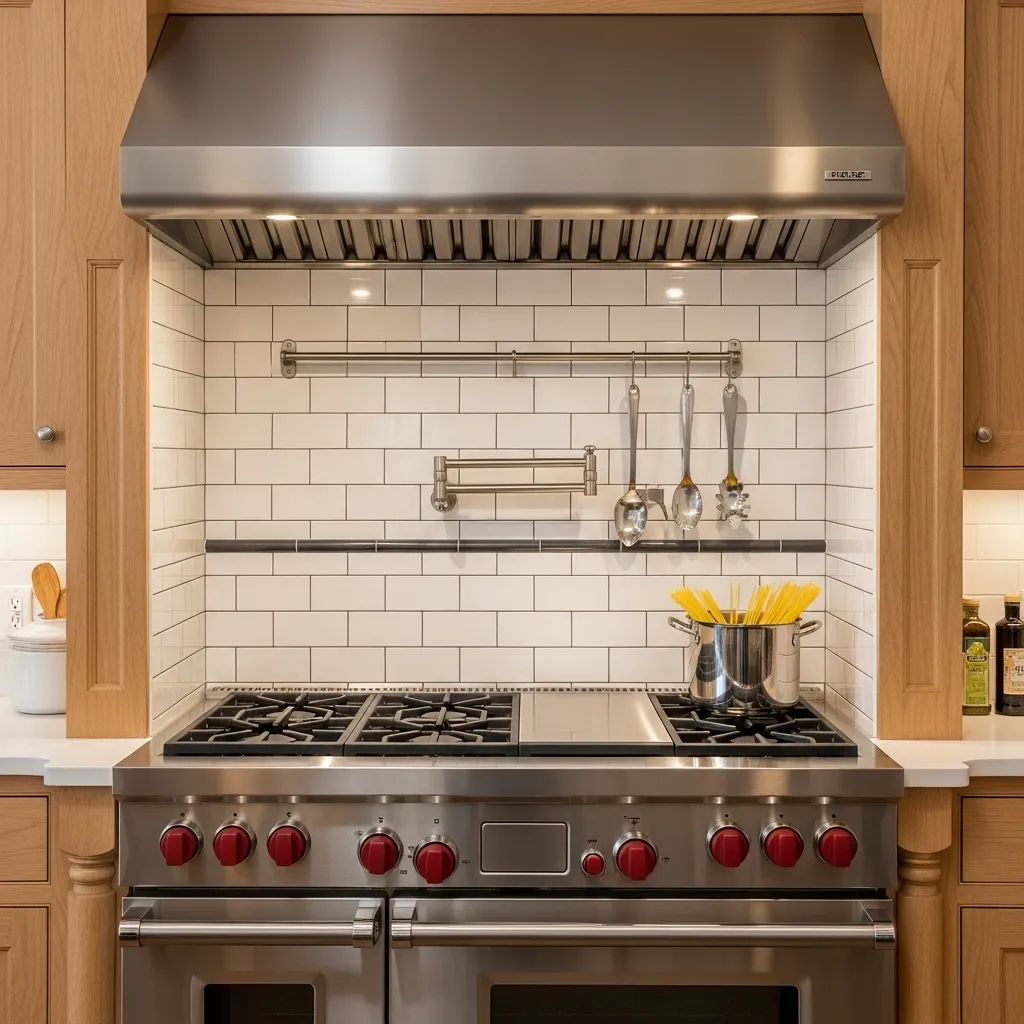
A framed tile panel behind the stove adds architectural interest and visual structure. Use trim pieces, metal edging, or contrasting tile borders to define the space. This technique allows you to showcase a patterned or textured tile without overwhelming the wall, making it a refined focal point.

Mixed Materials
Mixing tile with materials like stainless steel, quartz, or even wood creates a layered, high-end look. A tiled center panel flanked by metal or stone adds depth and durability, especially in high-use cooking zones. This approach balances texture and tone while enhancing both function and style.
Color and Pattern Play
Don’t be afraid to introduce color or pattern behind the stove. Geometric tiles, Moroccan motifs, or bold subway layouts can energize the space and draw the eye, just make sure they harmonize with your flooring and cabinetry.
Frequently Asked Questions
How far down should I tile behind a freestanding stove?
Start at the countertop level and tile upward 18–24 inches. If the stove has a backguard, begin just above it.
Can I tile all the way to the floor behind the stove?
Yes, especially if the stove is freestanding and the wall is exposed. This adds protection and visual continuity, especially with open-concept layouts.
What tile materials are best behind the stove?
Ceramic, porcelain, sealed natural stone, and glass are all excellent. They’re heat-resistant, easy to clean, and available in a wide range of styles.
How do I coordinate backsplash with durable kitchen floor tile ideas?
Choose complementary textures, tones, or finishes. For example, if your floor tile is matte and earthy, consider a glossy neutral backsplash for contrast. This creates visual balance and cohesion.
Function Meets Flair
Knowing how far down to the tile behind the stove is a small detail that makes a big impact. It protects your kitchen walls, simplifies cleaning, and enhances your overall design. Whether you stop at the cabinet base or tile to the ceiling, the key is intentional placement and material choice.
And don’t forget the floor your backsplash should complement it. If you’re exploring durable kitchen floor tile ideas, think about how color, texture, and finish can echo upward into your backsplash. Together, they create a kitchen that’s not only functional but visually unified and timeless.