Few home issues are as alarming as stepping onto a soft, spongy floor around your toilet. If you’re wondering how to fix it fast, here’s the quick answer: Replacing a subfloor under a leaking toilet DIY involves removing the toilet, cutting out the damaged wood, repairing joists if needed, and installing new, moisture-resistant subfloor panels before resealing the toilet. It’s a manageable project if you’re patient, precise, and follow the right steps.
A soft floor isn’t just uncomfortable, it’s a warning sign that water has seeped beneath the surface and compromised the structure of your bathroom. What begins as a small leak can rapidly weaken your subfloor, invite mold, and create an unsafe environment. But the good news? You can restore stability and safety yourself with proper guidance, making replacing a subfloor under a leaking toilet DIY not only possible but cost-saving.
What Happens When Your Toilet Leaks Beneath the Surface

Even a slow, unnoticed leak from your toilet can cause significant structural damage. When water escapes past the wax ring, it soaks into the plywood or OSB subfloor below. Over time, this trapped moisture weakens the wood, causing it to soften, swell, and rot. In humid environments, it can also spark mold growth that affects both your floor and your indoor air quality.
The challenge is that this damage often develops silently. A slight wobble in the toilet base, a faint musty smell, or subtle staining on the bathroom floor are often the only early signs that water has been eroding the strength of your subfloor. Understanding these early warnings helps you act quickly and makes replacing a subfloor under a leaking toilet DIY far easier than waiting until the damage spreads.
Tools & Materials
- Pry bar and hammer
- Circular saw
- Power drill
- Measuring tape
- Utility knife
- Replacement plywood or OSB (same thickness as existing)
- Construction adhesive
- Screws
- Toilet wax ring replacement kit
- Safety gloves and goggles
Step-by-Step Guide to Replacing a Subfloor Under a Leaking Toilet (DIY)
If you’re tackling replacing a subfloor under a leaking toilet DIY, these steps will guide you through a safe, solid, and long-lasting repair.
1. Turn Off the Water and Remove the Toilet
Start by shutting off the water supply and flushing the toilet to empty the tank and bowl. Disconnect the water line, then gently lift the toilet straight up and set it aside on a towel or piece of cardboard.
Important: Plug the drain hole with a rag to block sewer gases while you work.
2. Assess the Damage Thoroughly
Remove the flooring around the toilet base to expose the subfloor. Use a screwdriver or awl to test the wood, if it’s soft, crumbly, or visibly swollen, it must be replaced.
Check the joists beneath for mold, moisture, or rot. If the joists are compromised, you’ll need to repair or sister them before continuing your DIY subfloor replacement.
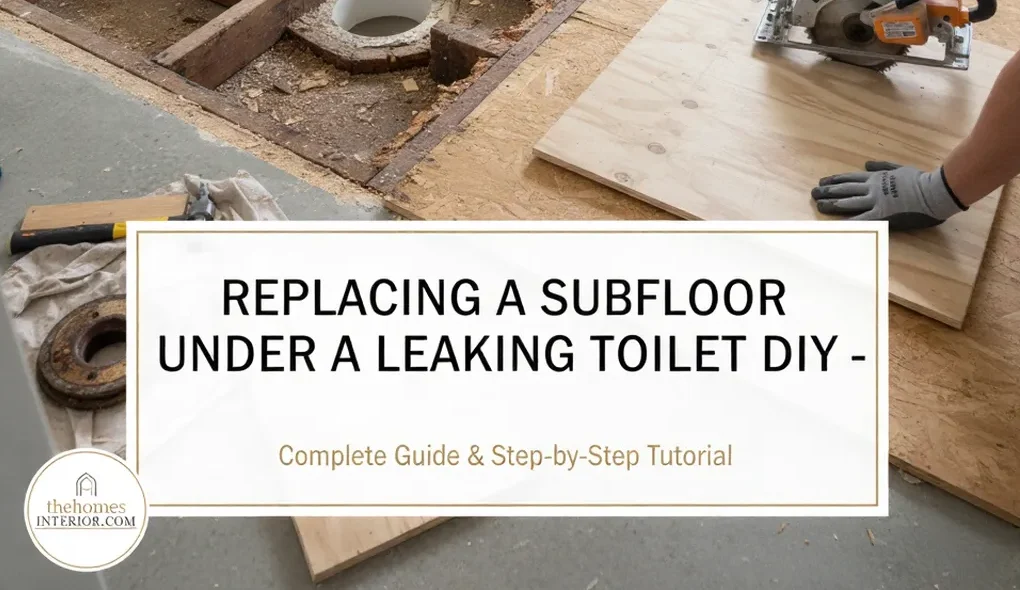
3. Cut Out the Damaged Subfloor
Set a circular saw to the exact thickness of your existing subfloor. Carefully cut out the damaged section, working slowly around the toilet flange and plumbing.
Avoid hitting joists or pipes, and remove all loose debris. The edges of the cut should be clean, solid, and structurally sound before installing new material.
4. Prepare and Install the New Subfloor Panel
Measure the opening and cut a new piece of plywood or moisture-resistant OSB to fit securely.
Apply construction adhesive to the joists and screw the panel down tightly.
A secure, level subfloor is essential for preventing future leaks and ensuring your toilet sits firmly without wobbling.
This is a crucial step in replacing a subfloor under a leaking toilet DIY, as a stable foundation supports both the toilet base and future flooring.
5. Reinstall the Toilet Properly
Once the new subfloor is dry and secure, install a new wax ring or wax-free seal around the toilet flange.
Carefully lower the toilet into place, tighten the bolts evenly, and reconnect the water line.
Test the toilet for leaks and make sure it sits level. Even a slight tilt can strain the seal and lead to another leak.
Preventing Future Damage
A successful repair means nothing if the leak returns. Protect your bathroom by maintaining strong moisture defenses:
- Inspect the base of the toilet regularly
- Replace the wax ring every few years or any time the toilet feels unstable
- Use a flange extender if your new subfloor or flooring raises the toilet height
- Address small leaks immediately to prevent hidden damage
If you’re planning outdoor shower installations or moisture-prone areas elsewhere in your home, remember that proper waterproofing and drainage are just as important as they are when repairing an indoor leak.
When to Call a Professional
While replacing a subfloor under a leaking toilet DIY is doable for careful homeowners, some situations require expert help:
- Extensive mold or blackened wood
- Structural joist rot needing reinforcement
- Persistent leaks after reinstalling the toilet
- Complicated plumbing connections or flange issues
- Uncertainty about the scope of damage
A professional can ensure long-term structural integrity especially in older or heavily damaged bathrooms.
Cost Expectations
If you’re doing it yourself, replacing a subfloor under a leaking toilet DIY typically costs $100–$500, depending on materials and tools you already have.
If joists or plumbing need repair, professional costs range from $800–$1,500.
Factors affecting cost include:
- Flooring type
- Extent of water damage
- Local labor rates
- Condition of joists and plumbing
Why Identifying Subfloor Damage Early Makes All the Difference
Catching subfloor damage in its early stages can save you from major structural repairs later. When moisture first seeps in, the problem is often confined to a small area around the toilet flange. Addressing it quickly, by drying the space, sealing leaks, and replacing minor sections, can prevent widespread decay and costly reconstruction.
Early detection also protects your home’s indoor air quality. As damp wood sits beneath the surface, it can release spores that trigger allergies and odors. By paying attention to early warning signs like soft flooring, persistent dampness, or musty smells, you can act before the problem compromises your bathroom’s safety and comfort.
Strong Floors, Confident Homes
Your bathroom floor does more than support a toilet; it supports peace of mind. By taking the time to repair water damage correctly, you’re not just fixing wood; you’re restoring stability and preventing future headaches. Even better, you gain hands-on experience and control over your home’s health.
A small leak may have started the problem, but your effort ends it for good. Have you ever repaired a subfloor yourself, or are you considering starting soon? Share your experience and insights below. I’d love to hear how your project turned out!
Frequently Asked Questions
How long should I wait before reinstalling flooring over the new subfloor?
Allow at least 24 hours for adhesives to cure and for the area to dry completely.
Can I use pressure-treated plywood for the replacement?
It’s not necessary indoors. A high-quality exterior-grade plywood is sufficient and safer for interior air quality.
What’s the best sealant to protect the new subfloor?
Use a moisture barrier primer or polyurethane coating to prevent future absorption.
Do I need to replace the toilet flange when repairing the subfloor?
If the flange is corroded, cracked, or loose, it’s best to replace it during this repair for a watertight seal.